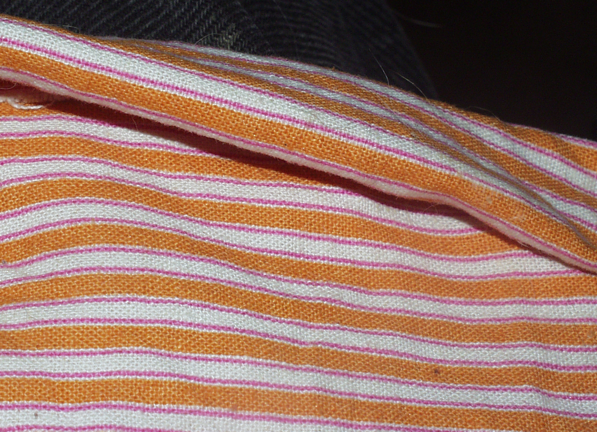
By increasing the amount of cloth folded back
at the top of the mask, the height of the mask can be
adjusted. By pulling the outer corners down more than the
center, the mask can be shaped so that it covers the top of
the nose but doesn't interfere with the eyes. That means the
folds have to be folded on a slanted line with not so much
folded down at the top of your nose. The leftover part of the
mask that goes behind the front part will stick out and help
prevent air from going up and down the channels on either side
of the nose.
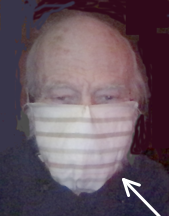
In the photo above, you can see how the fabric has been pinched and stitched at the top center the help prevent the mask from sliding down. The arrow points at the location of the the chin strap tightener. This cord on the bottom of the mask can be tightened or loosened to make just enough space for your chin to fit snugly into
The Filti nanofiber filter, unlike the kind in N95 masks, can be cleaned. Hand wash the mask in some gentle soap or detergent. You can put it through the dryer if you put it in one of those white mesh bags with a pull cord on one end. (The outside is tough enough to go through regular laundry, but I doubt that the filter in the middle could stand up against anything that might try to pull it apart.)
Here is the pattern. It uses a half-inch grid.
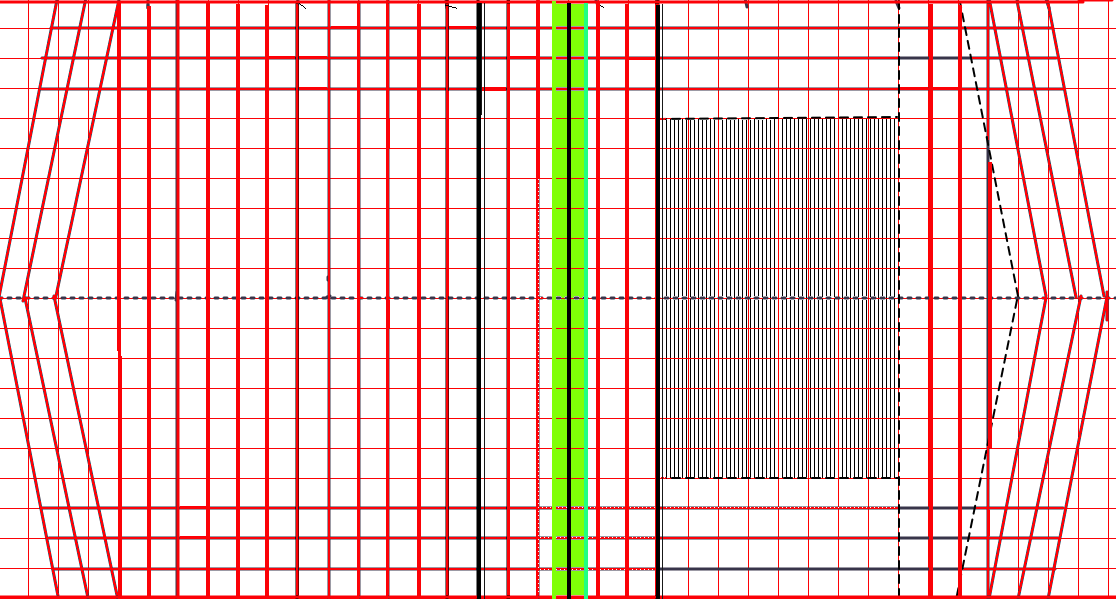
fold tunnel fold filter
(makes bottom edge
of the mask)
↑_the two folds match up _↑
In the photo above, you can see how the fabric has been pinched and stitched at the top center the help prevent the mask from sliding down. The arrow points at the location of the the chin strap tightener. This cord on the bottom of the mask can be tightened or loosened to make just enough space for your chin to fit snugly into
The Filti nanofiber filter, unlike the kind in N95 masks, can be cleaned. Hand wash the mask in some gentle soap or detergent. You can put it through the dryer if you put it in one of those white mesh bags with a pull cord on one end. (The outside is tough enough to go through regular laundry, but I doubt that the filter in the middle could stand up against anything that might try to pull it apart.)
Here is the pattern. It uses a half-inch grid.
fold tunnel fold filter
(makes bottom edge
of the mask)
↑_the two folds match up _↑
1. Fold and secure the long horizontal seams.
(If you don't do this you will have unraveling of cloth edges
where the chin tightener strap comes out.)
2. Fold the center line (shown next to the word "tunnel" above).
3. Sew along the outer edges of the green tunnel region shown above. They will be on top of each other after you make the fold, so you only sew one line of stitches.
4. Now that the mask material has been folded once, the black lines marked above will be one on top of the other. Fold along this line so that you have something like a trouser leg with a cuff at the bottom.
5. Baste or fasten the filter material with fabric glue on the edges only.
6. The cuff that you've just sewn forms the bottom of the mask. It goes under the chin. Put a drawcord through the tunnel, and when you tighten it up you will form a semicircular "shelf" for the chin to sit on.
7. Sew together what are now the vertical sides of the mask (or use fabric glue on them). They are formed by the top and bottom parts of the pattern above. But before you do this you may want to experiment with the fold that determins the depth of the "shelf" that the chin sits on.
8. The top folds down on the same side of the mask as the shelf, i..e, when you are wearing you mask will puff out against youf face. See below for pictures. This part works best if you do some personal fitting.
8.
Here is the produict of a few hours work.

The wings that extend from the sides of the mask can be pinned
back. As you can see, there is a great deal of surfacce area
for this mask. That shold maake it filter better and be easier
to breathe through.
2. Fold the center line (shown next to the word "tunnel" above).
3. Sew along the outer edges of the green tunnel region shown above. They will be on top of each other after you make the fold, so you only sew one line of stitches.
4. Now that the mask material has been folded once, the black lines marked above will be one on top of the other. Fold along this line so that you have something like a trouser leg with a cuff at the bottom.
5. Baste or fasten the filter material with fabric glue on the edges only.
6. The cuff that you've just sewn forms the bottom of the mask. It goes under the chin. Put a drawcord through the tunnel, and when you tighten it up you will form a semicircular "shelf" for the chin to sit on.
7. Sew together what are now the vertical sides of the mask (or use fabric glue on them). They are formed by the top and bottom parts of the pattern above. But before you do this you may want to experiment with the fold that determins the depth of the "shelf" that the chin sits on.
8. The top folds down on the same side of the mask as the shelf, i..e, when you are wearing you mask will puff out against youf face. See below for pictures. This part works best if you do some personal fitting.
8.
Here is the produict of a few hours work.